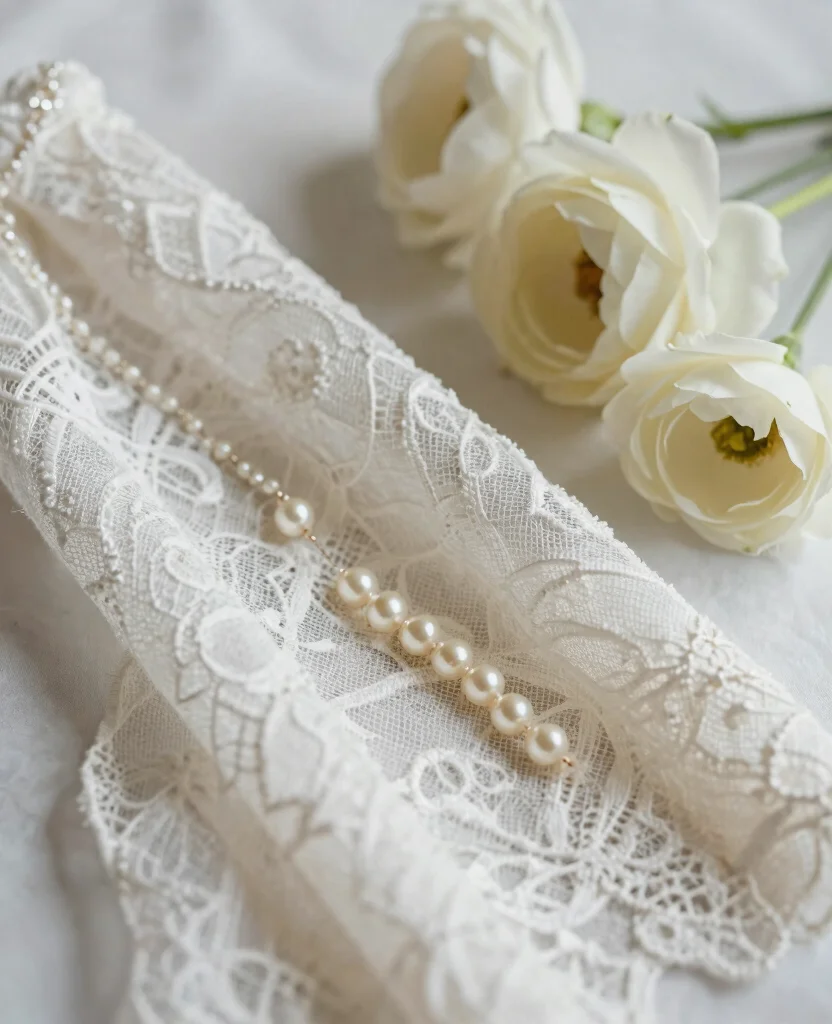
Planning a wedding is an exciting yet overwhelming experience, and every detail counts when it comes to creating your perfect day. One often-overlooked detail that can add a touch of elegance to your bridal look is your nails. If you’re looking to elevate your wedding day style, then look no further. This post is all about stunning wedding nails with pearls that will make your hands shine as bright as your love.
Whether you’re a bride-to-be or a bridesmaid, your nails deserve to be a part of the spotlight. If you’re into unique styles and love the idea of incorporating pearls into your bridal look, this guide is tailored just for you. From classic designs to modern twists, I’ve gathered a variety of ideas that are chic, glamorous, and perfect for any wedding theme.
In this post, you will discover ten breathtaking nail designs featuring pearls that will inspire you to create the ultimate bridal look. Each design varies in style, so you will find something that resonates with your personal taste. Get ready to be inspired and make your nails a stunning focal point on your special day!
Key Takeaways
– Discover a range of stunning wedding nail designs featuring pearls that can enhance your bridal look.
– Explore classic options like French tips with pearls for timeless elegance.
– Get creative with modern designs, including the pearl-embedded ombré effect for a unique flair.
– Consider playful styles such as whimsical pearl dots to showcase your personality.
– Find practical tips on how to incorporate pearls into your wedding nails for a cohesive bridal aesthetic.
1. Classic French Tips with Pearls

You’re looking for a classic bridal nail design that stands out. French tips are a timeless choice, and when you add pearls, they become truly special. Imagine crisp white tips adorned with tiny pearls that shimmer with every movement. This elegant style is perfect for any wedding theme, harmonizing beautifully with both modern and vintage dresses.
To personalize this look, experiment with different pearl shapes like oval or teardrop. You might even place a single pearl on your ring finger for a charming detail. This minimalist yet sophisticated design will elevate your wedding day style.
Key steps to get started:
– Use a high-quality nail polish for a flawless finish.
– Apply a thin layer of topcoat to secure pearls and enhance shine.
– Choose faux pearls for a lighter feel without sacrificing luxury.
– Coordinate with a matching pearl bracelet for a complete ensemble.
This design promises to capture attention and complement your bridal beauty effortlessly.
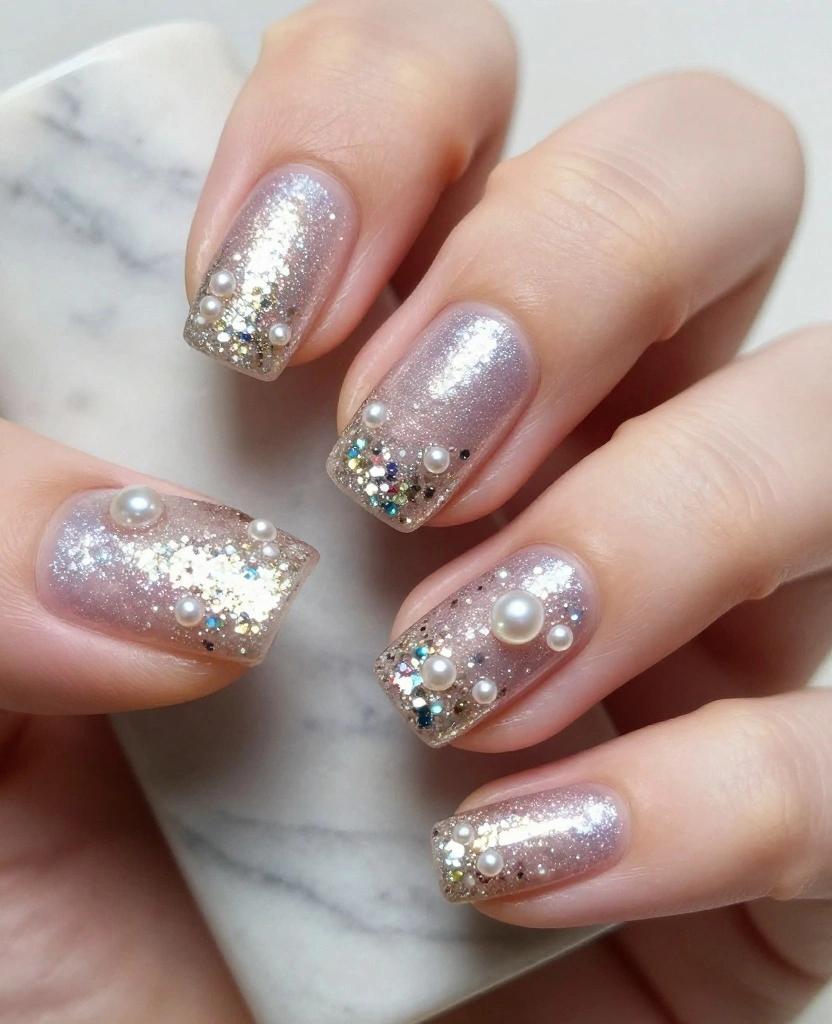
2. Pearl-Embedded Ombré Effect
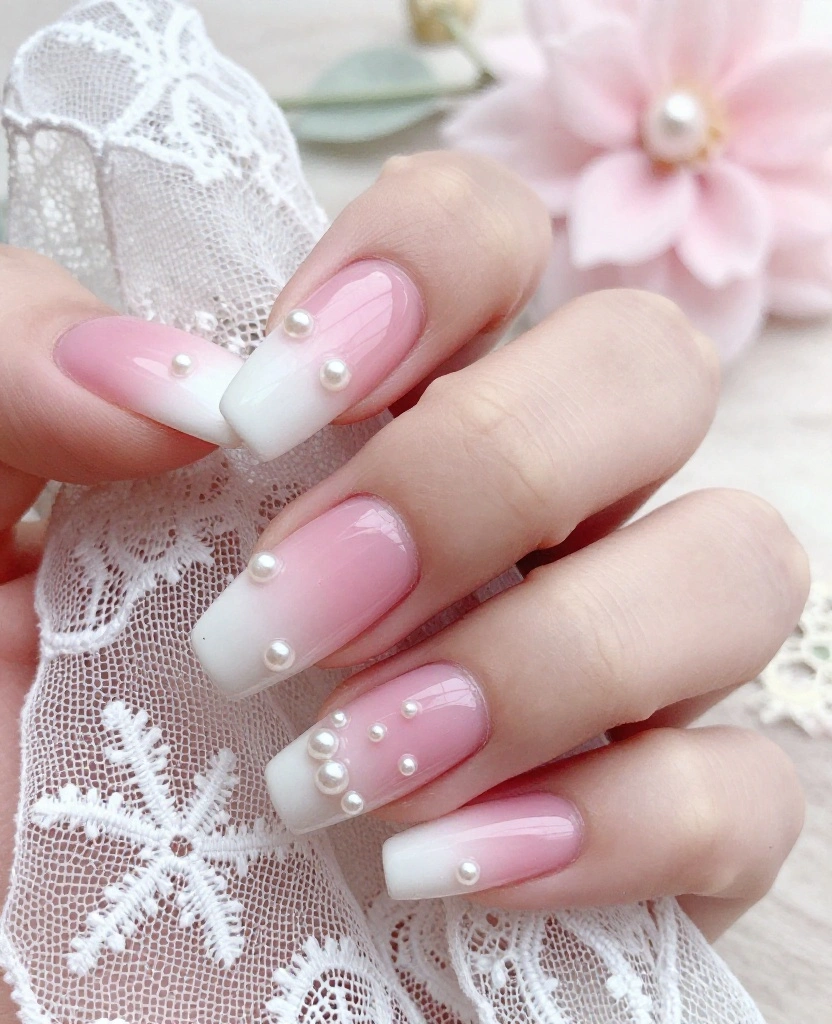
If you’re drawn to dreamy designs, the ombré effect with pearls is a stunning choice. Imagine a soft pink-to-white gradient embellished with tiny pearls, creating a whimsical touch for your wedding look. This contemporary style adds a romantic flair and can beautifully match your wedding attire.
For a more personalized touch, select muted pastel shades or vibrant colors that align with your theme. The addition of pearls not only enhances the design but also invites admiration from your guests.
How to achieve this look:
– Start with a base coat and create a gradient using a sponge.
– Once dry, place pearls along the ombré line for a sparkling effect.
– Seal everything with a topcoat for durability.
– Match your ombré with your bouquet for a cohesive appearance.
This design will make your nails a stunning focal point on your special day.
Fun fact: 58% of brides say wedding nails with pearls elevate photos more than plain polish. An ombré pearl design blends soft hues with tiny pearls for a timeless, camera-ready glow.
📹 Related Video: Glamorous Gradient Pearl Ombre Nails
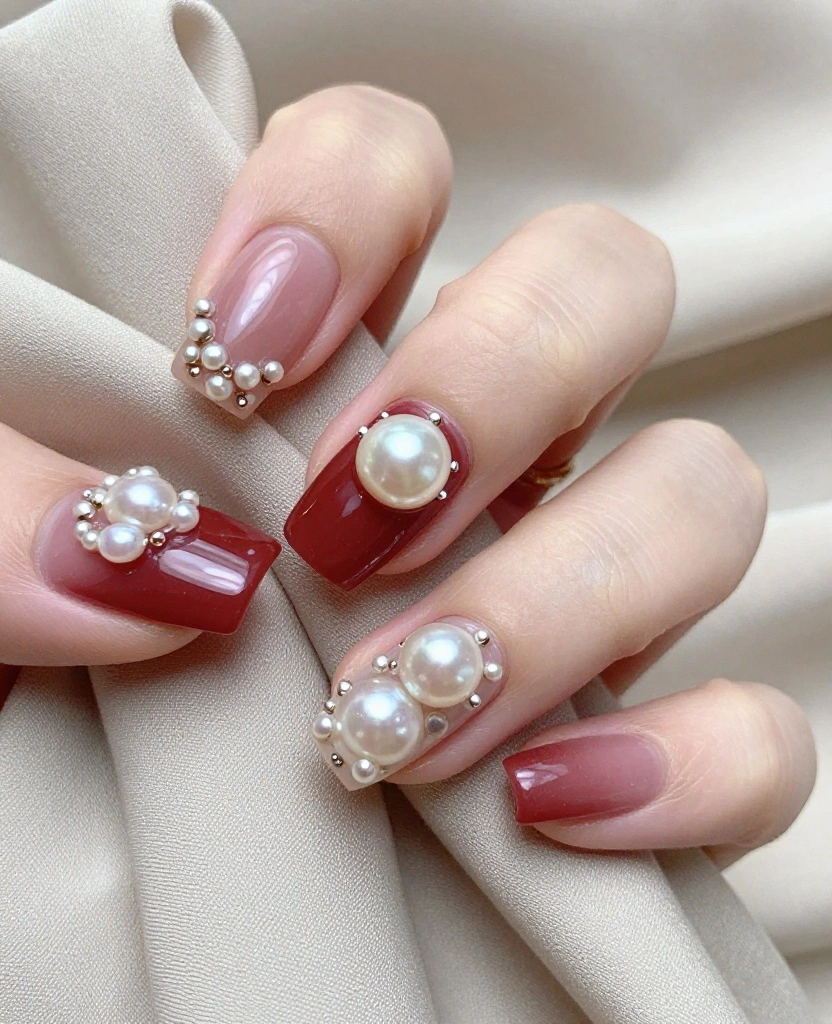
3. Pearl Accents with Glitter
For brides who love a bit of sparkle, combining pearls with glitter creates a dazzling effect. Picture pearlescent nails accented with subtle glitter at the cuticles or sides, striking the perfect balance between elegance and glamour. This design is ideal for adding just the right amount of shine without overwhelming your look.
You can enhance this style by playing with glitter sizes or varying pearl dimensions for added depth. Pair your nails with glittery accessories to create a cohesive bridal look.
Steps to create this design:
– Select a base color that complements your wedding dress.
– Apply glitter polish at the base or tips while leaving space for pearls.
– Use a strong adhesive to keep pearls secure throughout the day.
– Consider a matte topcoat to contrast the shine of glitter and pearls.
This design will leave a lasting impression while keeping your bridal look chic.
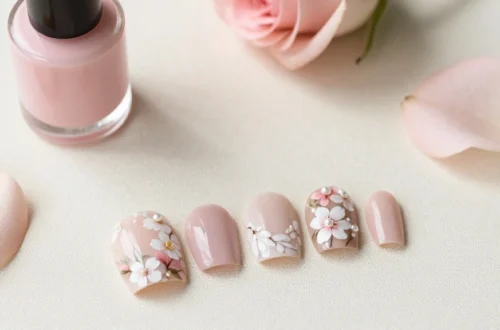
4. Bohemian Floral Nails with Pearls
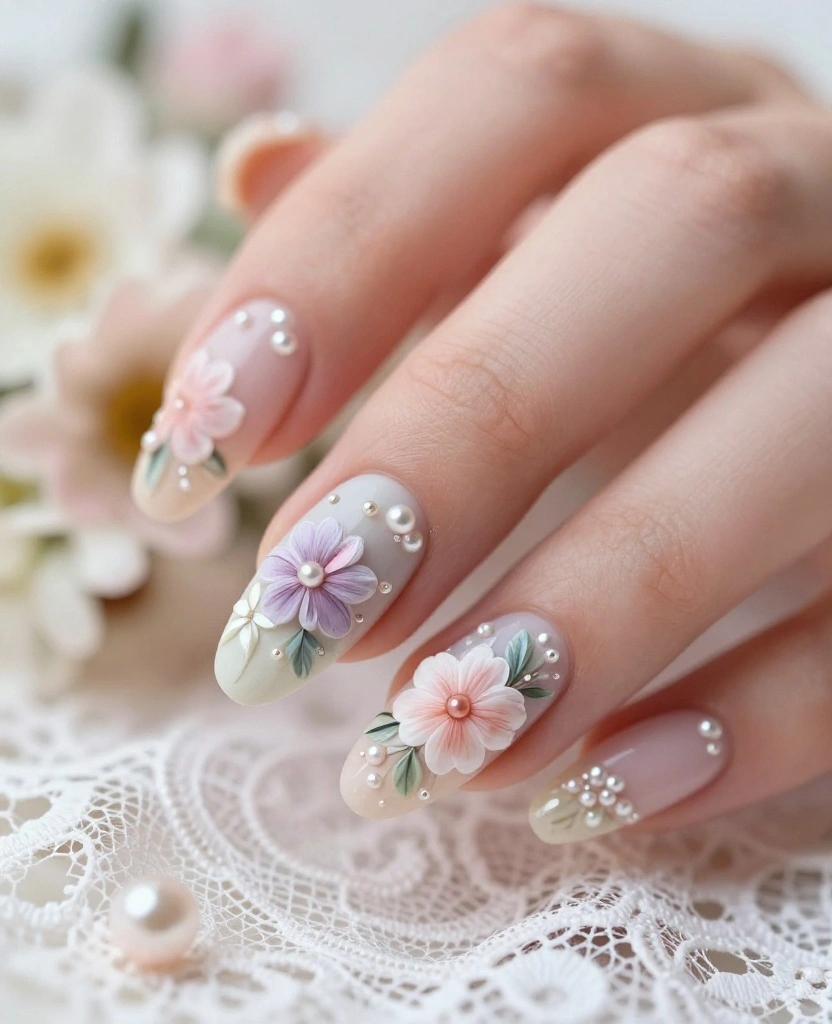
For the free-spirited bride, floral designs paired with pearls embody a charming bohemian vibe. Picture soft pastel colors adorned with tiny pearl details that highlight delicate hand-painted flowers. This enchanting design is perfect for a rustic or outdoor wedding, blending elegance with a laid-back aesthetic.
You can opt for a single floral motif on each nail or create intricate patterns across all fingers. Incorporating pearls into the flowers, like in their centers, adds an exquisite touch to your overall look.
Steps to achieve this design:
– Start with a light base color to let the flowers shine.
– Use fine brushes to paint intricate floral designs.
– Embed pearls in flower centers or dot them throughout.
– Finish with a clear topcoat for protection and shine.
This design will beautifully enhance your bridal style, adding a touch of nature’s beauty.
Wedding nails with pearls feel effortless yet unforgettable—perfect for a bohemian vibe. Picture soft pastels, delicate hand-painted flowers, and pearl centers that catch the light as you say your vows. Embrace this look for rustic outdoor weddings and moments that deserve a touch of magic.
5. Minimalist Pearl Stripes
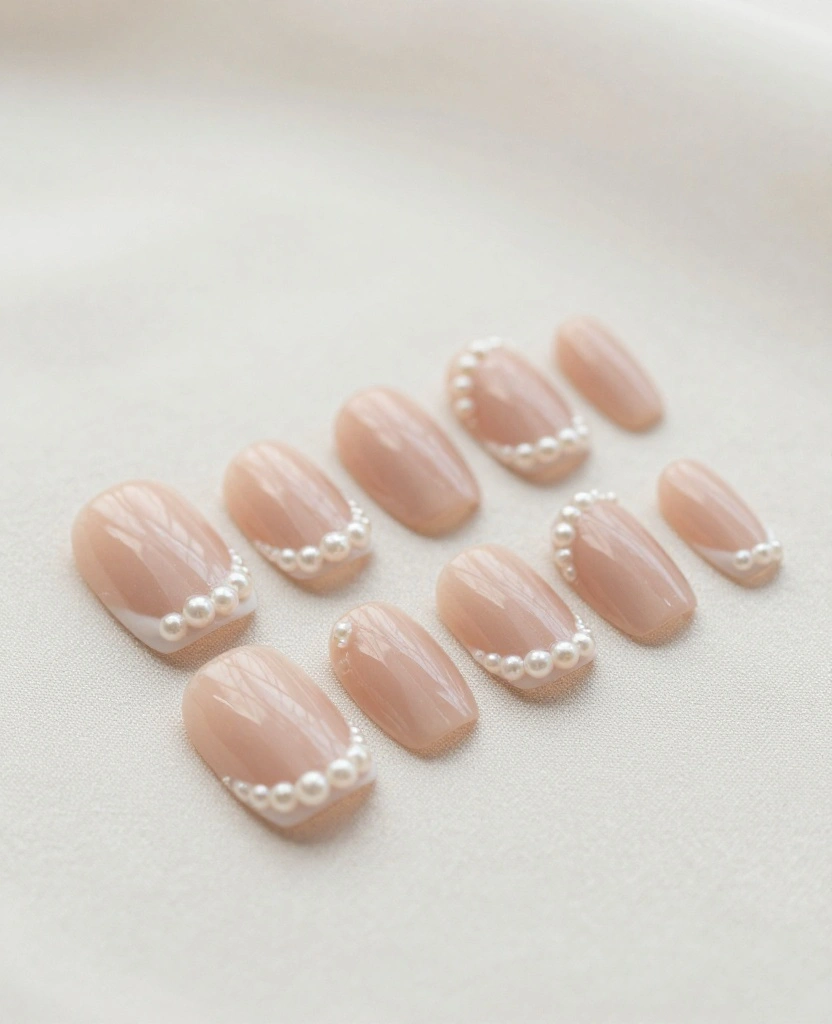
If you appreciate simplicity, minimalist pearl stripes can create an effortlessly elegant look. Think sheer bases with delicate pearl stripes crossing your nails. This understated design allows your natural beauty to shine through, making it perfect for brides who prefer a subtle charm.
You can customize the look by adjusting the thickness and spacing of the stripes. For a modern touch, consider using colored bases with light pearl accents, like soft nudes or subtle pinks.
How to create this design:
– Apply a sheer base coat for a smooth finish.
– Use nail tape to create even stripes for the pearls.
– Adhere pearls along the stripes, ensuring even spacing.
– Finish with a glossy topcoat for extra shine.
This design will highlight your elegance while maintaining a clean, chic appearance.
You might also like
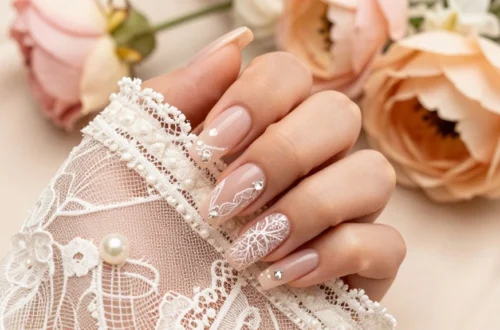
6. Vintage Lace and Pearls
For brides who adore nostalgia, vintage-inspired nail designs evoke timeless charm. Envision delicate lace patterns painted onto soft nude or ivory nails, adorned with pearls for an exquisite finish. This design beautifully mirrors the elegance often found in classic wedding dresses.
You can choose to concentrate lace details at the tips or cover the entire nail. Strategically placing pearls at lace intersections enhances the vintage effect, making your nails resemble a work of art.
How to achieve this look:
– Use a lace stencil or hand-paint for an authentic touch.
– Select colors that complement your bridal attire.
– Vary pearl sizes for added texture.
– A matte topcoat offers a vintage feel, while a glossy finish modernizes the design.
This design will elevate your bridal nails to a stunning piece of art.
7. Bold Jewel Tones and Pearls
For the daring bride, bold jewel tones offer a vibrant backdrop for pearl accents. Think deep greens, rich blues, or vibrant purples that contrast beautifully with pearls, creating a striking visual appeal. This look is ideal for fall or winter weddings, reflecting the richness of the season.
You can integrate pearls through accent nails or as a statement piece on your ring finger. Mixing and matching colors while keeping the pearls consistent will unify the overall look.
How to achieve this design:
– Apply a high-quality base coat in your chosen jewel tone.
– Use smaller pearls for subtlety or larger ones for a statement.
– Mix colors for a unique effect, ensuring pearls are consistently placed.
– Finish with a glossy topcoat to enhance colors and pearl shine.
This bold design will make a memorable statement on your special day.
Bold jewel tones with pearls let wedding nails with pearls glow against winter bouquets. Try deep greens, rich blues, or vibrant purples, using pearls on an accent nail or a single ring-finger piece for a cohesive, runway-worthy look.
8. Geometric Designs with Pearl Accents
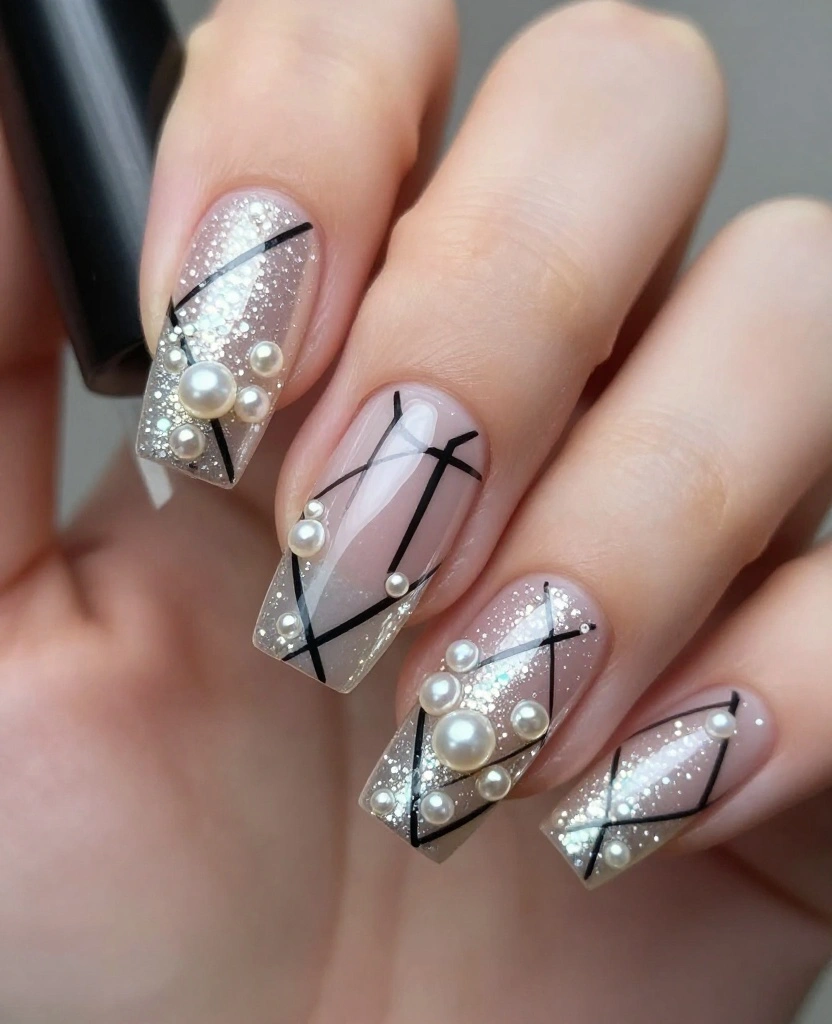
If you’re seeking a modern aesthetic, geometric nail designs with pearls create an edgy yet elegant look. Picture bold lines and shapes where pearls serve as focal points in the overall design. This style is perfect for contemporary brides wanting to express their unique personality through their nails.
You can use contrasting colors to craft distinctive geometric patterns while incorporating pearls to soften harsh lines. The combination of structured designs with delicate pearls creates a visually stunning balance.
How to achieve this look:
– Use nail tape for precise geometric shapes.
– Choose colors that fit your wedding theme.
– Place pearls at intersections or as highlights in the design.
– Finish with a glossy topcoat for a polished look.
This design will reflect your modern style and creativity beautifully.
You Might Also Like
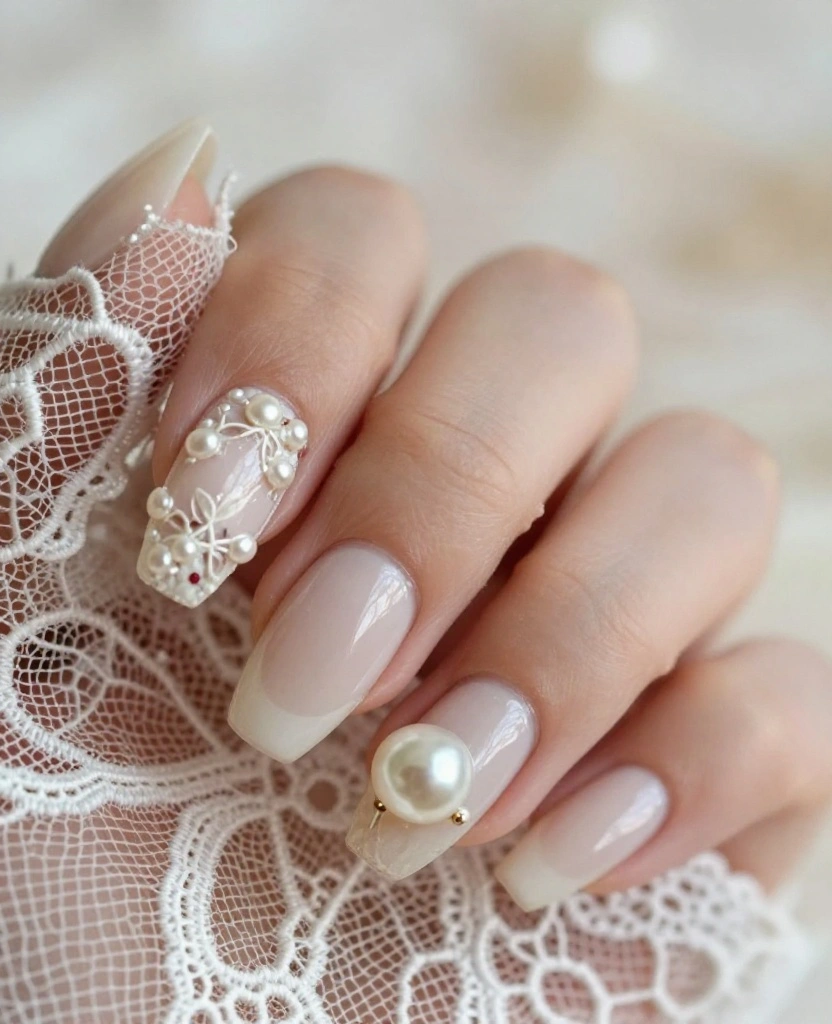
9. Glittering Pearls at the Base
For a design that adds drama while keeping your bridal look chic, consider glittering pearls at the base of your nails. This approach draws attention upward, enhancing your overall elegance. Picture a nude or pastel base adorned with clusters of pearls and glitter right at the cuticle.
This versatile design suits various nail shapes, from stiletto to square, and beautifully captures light as you move. It’s an excellent complement to any wedding gown.
How to create this look:
– Start with a nude or pastel base of your choice.
– Use strong adhesive to secure pearls and glitter at the base.
– Apply a topcoat for protection and shine.
– Consider matching colors with your bridal bouquet for a cohesive look.
This design will add a touch of glamour to your wedding day without overshadowing your beauty.
How To Choose the Right Wedding Nails with Pearls
Choosing the perfect wedding nails with pearls can truly elevate your bridal look. With so many styles and designs available, it’s essential to consider various factors that will help you create your ideal nail art. Here are some tips to guide you through the selection process:
1. Nail Shape
The shape of your nails plays a significant role in the overall design. Popular shapes include almond, stiletto, square, and oval. Choose a shape that complements your fingers and personal style. For instance, stiletto nails can make a bold statement, while almond shapes can offer a more elegant look.
2. Pearl Style
Pearls come in various styles, such as whole pearls, pearl dust, or pearl embellishments. Whole pearls create a classic, sophisticated vibe, while pearl dust can give a subtle shimmer. Think about whether you want a standout piece or a more delicate approach. Mixing pearls with gems or glitter can also add to the uniqueness of your design.
3. Color Palette
When choosing wedding nails with pearls, consider your wedding color scheme. Soft pastels, whites, and metallics are popular choices. If your wedding has a specific theme, like rustic or bohemian, your nail colors should align with that vision. You can also choose colors that match your bridal gown, bouquet, or bridesmaids’ dresses for a cohesive look.
4. Design Complexity
Decide how intricate you want your nail design to be. If you prefer a simple look, classic French tips with pearl accents could be your best option. For a more elaborate design, consider ombré effects or floral patterns with pearls embedded. Make sure the complexity of the design aligns with your overall bridal look.
5. Nail Length
The length of your nails can influence your design choices. Longer nails might allow for more detailed artwork, while shorter nails may require simpler designs. Consider your comfort level as well; you want to be able to enjoy your wedding day without worrying about your nails.
6. Quality and Application Method
Choose high-quality products to ensure your nails look beautiful and last throughout the wedding day. Acrylic or gel nails can hold designs better than natural nails. Make sure to select a skilled nail technician who can execute your vision flawlessly.
Pro Tip: Try out a few designs and colors in advance. Consider wearing a test set of wedding nails with pearls to see how they feel and look before the big day. This way, you can make changes if needed!
With all these factors in mind, you can confidently choose wedding nails that perfectly match your style and enhance your bridal look. Remember to enjoy the process and make it a fun part of your wedding preparations!
10. Whimsical Pearl Dots
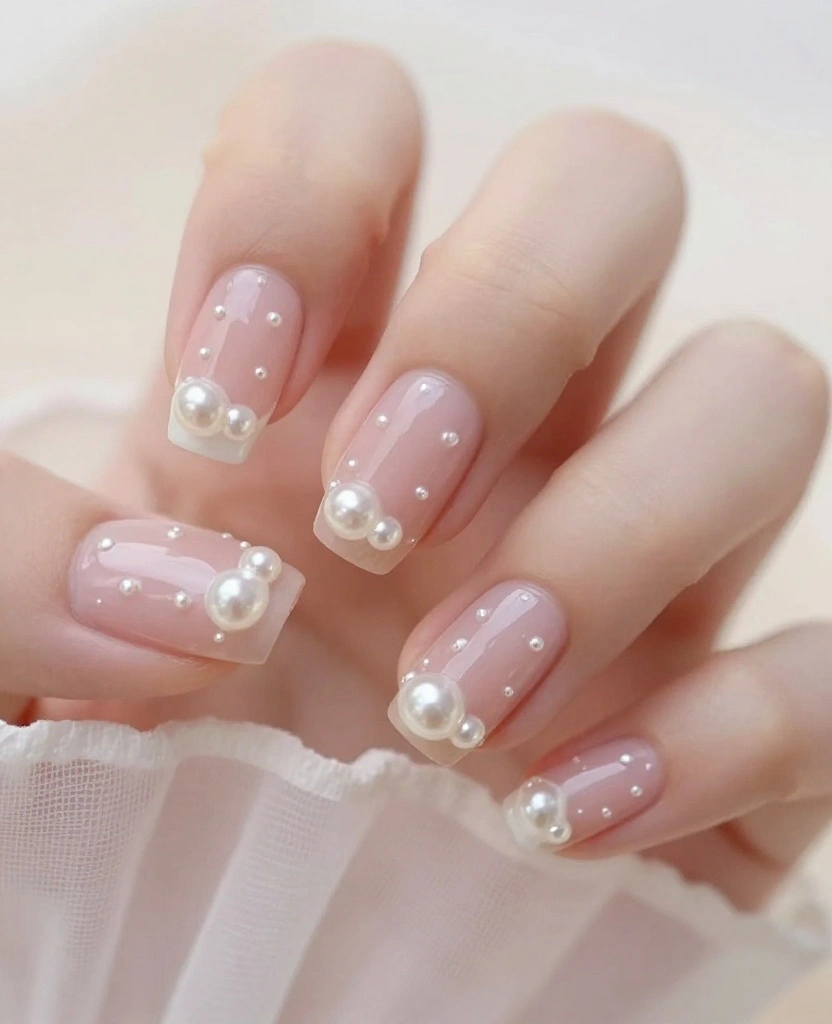
For a playful yet elegant touch, whimsical pearl dots can make your wedding nails stand out. Imagine tiny pearls arranged in abstract patterns or playful polka dots scattered across a pastel base. This design is perfect for brides who want to express joy and creativity while remaining chic.
Keeping the background color light allows the pearls to really shine. The playful dots can reflect your personality, making your nails a fun yet elegant accessory.
How to achieve this look:
– Start with a light base color that complements your wedding theme.
– Use a dotting tool or toothpick to position pearls evenly.
– Consider varying dot sizes for added visual interest.
– Seal the design with a topcoat to keep the pearls shining throughout your special day.
This delightful design will showcase your fun side while maintaining bridal elegance.
Conclusion
Incorporating wedding nails with pearls into your bridal look is a beautiful way to add elegance and sophistication to your overall style. From classic French tips to whimsical designs, there’s a pearl-inspired option for every bride. No matter your personal style, these designs can elevate your wedding day look, ensuring your nails are as memorable as your vows. So go ahead and choose the perfect pearl design that resonates with your unique love story.
Let these stunning ideas inspire you as you prepare for your big day, and don’t forget to think about how your nails tie in with your dress and accessories.
Frequently Asked Questions
What are chic design ideas for wedding nails with pearls?
Pearls add timeless elegance to bridal nails. For wedding nails with pearls, try a few stylish options you can ask your nail tech to recreate:
• Minimalist nude base with a single pearl on the ring finger for a classic look.
• A tiny pearl cluster near the cuticle on one accent nail for luxury without overdoing it.
• Pearl-lined French tips or a delicate pearl smile line for subtle shine.
• A small 3D pearl bouquet on one nail to echo your bouquet embellishments.
How to apply: prep nails, pick tiny flat-backed pearls, apply a thin dab of nail glue or gel, press pearls gently, and seal with a top coat. If you’re using gel or acrylic, cure between steps to lock pearls in place. Request a quick practice run to ensure comfort and durability.
Do pearls stay on nails for the wedding day, and how long do they last?
Yes, with the right method. For lasting wear on wedding nails with pearls, choose quality adhesives and seal with a strong top coat. If you’re wearing gel or acrylic, have pearls placed with cured layers so they won’t snag. Keep pearls out of water and avoid rough rubbing during photos. You can wear them for about 7–14 days with proper care, making them a perfect bridal option. Tips: bring a tiny spare pearl and a travel-friendly bottle of glue for quick fixes, and schedule a practice run before the big day.
How can I match wedding nails with pearls to my bridal gown and jewelry?
Coordinate color and metal tones with your look. For wedding nails with pearls, choose pearl shades that complement the gown (white, ivory, champagne). If your jewelry is gold, add warm-toned accents or gold pearl beads; silver or rose gold works with cooler tones. Bring fabric swatches or a photo of the dress to your nail artist and ask for a pearl shade that echoes lace or embroidery. Consider a nude base with white pearls for a timeless style, or a soft pearly accent to echo your pearl jewelry. The goal is harmony, not a perfect match.
Should I DIY wedding nails with pearls or hire a professional?
For most brides, hiring a pro yields the best result, especially for pearl details. If you DIY, use a high-quality nail glue, a steady hand, and a patient approach. Prep nails thoroughly, lay down a smooth base, and place pearls with precision using tweezers. Practice a test design first, and book a trial run to avoid surprises on the wedding day. If possible, reserve a professional appointment for the big day to ensure flawless application and long wear.
How should I care for pearl nail designs during the wedding planning and after?
During planning, keep pearls secure by avoiding over-handling or water exposure right after application. Aftercare matters: use a top coat to seal pearls, avoid acetone-based removers on the pearls, and apply cuticle oil to the surrounding skin so everything stays polished. For the big day, wear a protective glove if you’ll be in lots of photo sessions and keep a tiny kit with glue and a spare pearl. After the wedding, gently remove the pearls and store them for future use if desired. With the right care, your bridal nails with pearls can shine through photos and memories.
Related Topics
wedding nails
bridal nails
pearl accents
elegant designs
nail art
summer weddings
trending styles
DIY wedding nails
minimalist bridal
luxury nail designs
easy nail tutorials
classic bridal look